The Scourge of the Dragon Ninja: A Definitive Guide to All Purgatory Trial Gates in the New NINJA GAIDEN 4


Popular Now
 Geometry Dash
 Fortnite
 Gacha Club
 Warframe
 EA SPORT FC 25
 Roblox
 PUBG Mobile
 Free Fire
 Fall Guys
 Black Myth: Wukong
The return of the legendary Dragon Ninja in NINJA GAIDEN 4, co-developed by the masters of high-speed combat at Team Ninja and PlatinumGames, has reset the bar for AAA action games in 2025. This brutal, beautiful, and relentlessly challenging title introduces the Purgatory Trials—a core game mechanic that serves as the ultimate litmus test for players striving to reach the coveted rank of Master Ninja. These optional combat gauntlets, accessed through hidden Purgatory Gates, offer an immediate and intense taste of the highest difficulty settings, promising vast rewards for those who can endure the relentless waves of adversaries.
For dedicated players seeking 100% completion and mastery over the game’s deep combat systems, locating all 18 Purgatory Gates is mandatory. These trials are essential for farming NinjaCoin, gaining precious Weapon EXP, and acquiring crucial high-value consumables. This news guide provides the comprehensive, chapter-by-chapter locations for every Purgatory Gate, ensuring you do not miss a single opportunity to sharpen your blade against the deadliest foes the game has to offer.
 Understanding the Purgatory System: Risk, Reward, and High-Stakes Combat
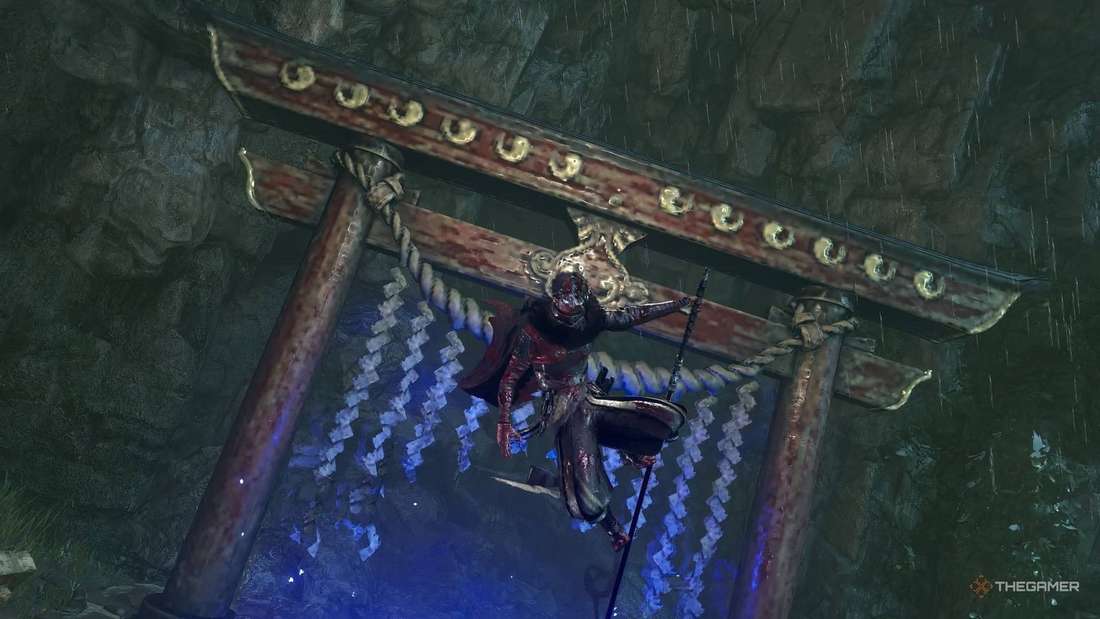
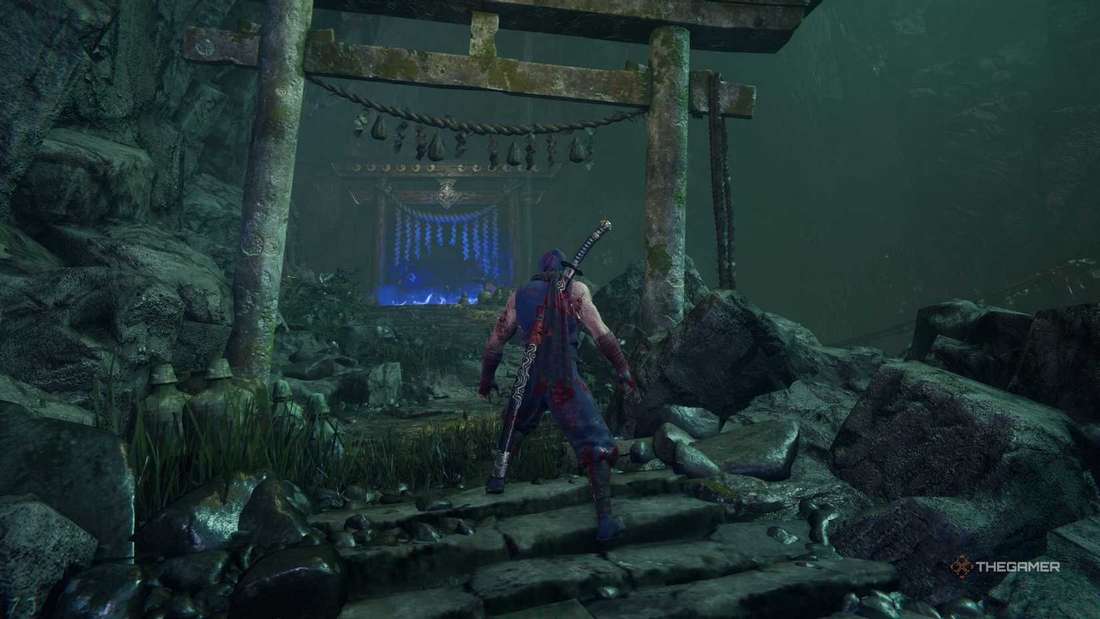
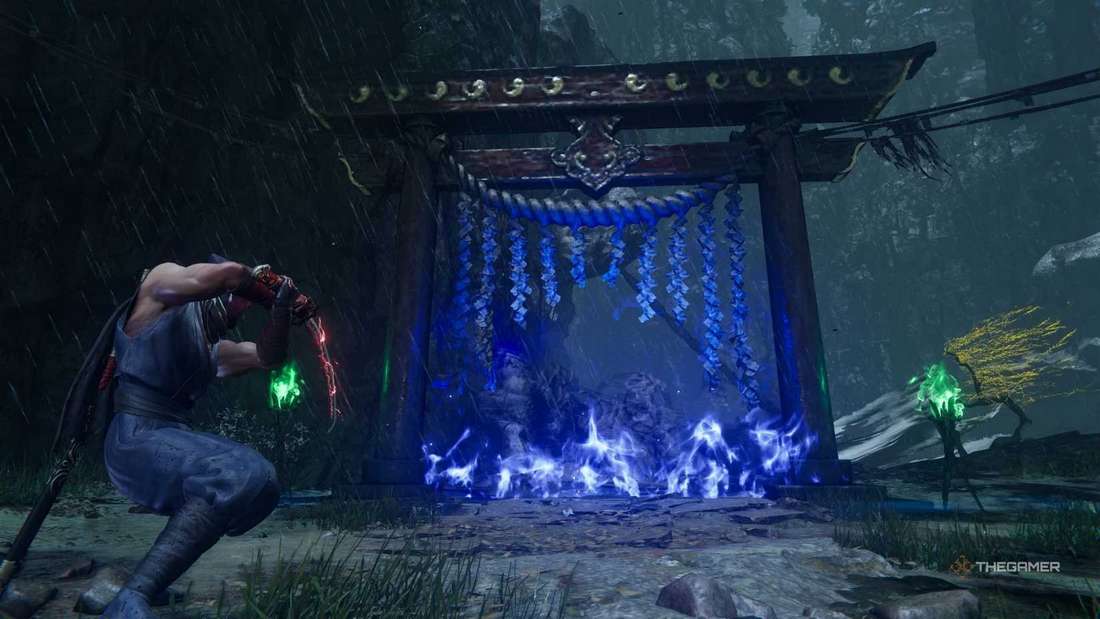
The Purgatory Trials are not mere side quests; they are a profound extension of NINJA GAIDEN 4’s philosophy of adversity. Each gate is marked by a distinctive, blazing torii and allows players to bet a portion of their maximum health—a unique risk-and-reward structure directly impacting the difficulty and payout. The six available wagers—from Realm of Gods (0% Health Wager) to the infamous Realm of Hell (75% Health Wager)—escalate the challenge dramatically. Successfully clearing a trial rewards the player commensurate with the risk taken, while failure means the wagered health is permanently deducted for the remainder of that chapter’s run.
This system forces players into a critical decision-making process: risk a significant portion of your resources for a chance at a massive payoff, or play it safe. Given the game’s emphasis on skill-based gameplay and high engagement rates, the Purgatory Trials are a critical component for players focused on character progression and unlocking the full potential of both Ryu Hayabusa and the new protagonist, Yakumo.
 Chapter-by-Chapter Purgatory Gate Locations: A Master Ninja’s Map
There is one Purgatory Gate hidden in every main story chapter, with the exception of Chapter 14. Finding them often requires straying from the main objective path and utilizing the game’s intricate environmental traversal mechanics, a nod to the series’ roots in both action and platforming.
-
- Chapter 1: Bloodsoaked Tokyo
The first gate is located early on, shortly after you obtain the Caddis Wire from Seori/Umi and use it for the first time to swing across a gap. After landing, instead of swinging across the second gap towards the objective, look to your left. Navigate past the large, neon-lit billboard in the alley. The gate is tucked into a discrete corner of this off-path area.
-
- Chapter 2: Haunted District
This gate is notoriously easy to miss due to the level’s breakneck pace. It appears right after the first major rail-grinding sequence of the chapter. Once you dismount the rail, and the flying grapple drones are introduced, immediately check the small, elevated platforms to the side of the main combat arena before engaging the wave of enemies. It requires a quick wall-run and leap to access.
-
- Chapter 3: Phantom Pleasure Quarter
This one is a classic Ninja Gaiden platforming trick. You will reach a point where you need to grind down a long, vertical rope. After the grind, land on the wooden platform and locate the updraft/wind tunnel. The main path directs you straight ahead, but to find the gate, you must perform a calculated, sharp-angled jump to the right within the wind tunnel’s flight. This leads to a separate, concealed platform where the gate awaits. Precision is key; falling means a full chapter restart.
-
- Chapter 4: Pilgrim’s Windswept Path
The gate is found near the mid-point of this lengthy chapter. It’s located just past the first instance of Umi’s shop where you can purchase items. Look in the immediate surrounding area, typically before the entrance to the larger settlement or village. The gate is often nestled behind a rock formation or a breakable barrier marked by faint green fireflies.
-
- Chapter 5: Tower of the Crimson Eclipse
Within the initial exterior grounds of the massive tower. Before beginning the vertical ascent using the rotating platforms and wall-runs, thoroughly check the peripheral ground level. The gate is usually placed in a darkened alcove underneath a support beam or a lower, hidden ledge, requiring a downward leap rather than an upward climb.
-
- Chapter 6: Azure Shores
In the expansive, water-logged ruins. After the combat encounter introducing the large, aquatic Daemons but before entering the subsequent large underground chamber, look for a small series of ledges near the water’s edge. You must perform a precise wall-run sequence to reach a separate, higher island where the gate is located.
-
- Chapter 7: Altar of the Mountain Gods
This gate is one of the more straightforward finds. As you progress toward the final, large gate that leads to the boss, turn around and descend the steps. Look for platforms marked by yellow hazard tape. Jump across these platforms and follow the path to the left where the gate is clearly visible.
-
- Chapter 8: Drowned District
Requires the Pond Strider traversal tool. Use the Strider until you reach the expansive, multi-tiered room known for its disco-like neon lighting. Clear the room of all enemies. The gate is found on a high-up mezzanine level or a platform that can only be reached by grappling up to a specific spot after the fight is concluded.
-
- Chapter 9: The Whispering Sands
Located in the open desert environment. Search the perimeter of the major landmarks, such as the large, derelict statue or a crashed airship. The gate is often partially concealed by a dune, following a narrow, obscured path that diverges sharply from the main trail.
-
- Chapter 10: Infiltration (Yakumo Chapter)
As the level progresses through the facility, you’ll encounter multiple rail-grinding segments. When you reach the rail that takes you past the building marked ‘E4,’ instead of continuing to the very end of the line, leap off the rail to a side platform that seems like a dead-end. The Purgatory Gate is located within this maintenance bypass area.
-
- Chapter 11: Clash of Convictions (Yakumo Chapter)
A short chapter primarily focused on a significant boss battle. From the starting point, immediately turn around and head down the stairs. Look for a grapple point on a ledge to the left. Grappling here initiates a small, hidden platforming sequence that leads directly to the gate, challenging the player’s impatience to reach the main confrontation.
-
- Chapter 12: Sky City Tokyo
High above the city, the gate is nestled among the dizzying structures. Look for it before the final, long vertical drop to the ground level—specifically near a set of massive ventilation fans or air-conditioning units. It requires a precise sequence of wall-runs and mid-air dashes to reach the elevated ledge.
-
- Chapter 13: Fanged Gate (Ryu Chapter)
After a major encounter, you’ll find yourself back in a familiar Underworld area, looking at a large, pulsating portal. The game urges you to enter. Ignore the portal. Instead, leap to the left and execute a wall-run around the perimeter of the chamber. This path leads to a smaller, secondary passage containing the Purgatory Gate.
-
- Chapter 15: The Serpent’s Coil
In this dark, damp subterranean complex, the gate is found after defeating the first group of large, mutated Serpent Daemons. Inspect the walls and corridors closely. Look for a section of the wall that appears brittle or discolored. Using a heavy weapon or an Exploding Dart can break the masonry, revealing the hidden passage to the gate.
-
- Chapter 16: The Dragon’s Ascent
This chapter is a long vertical climb. The Purgatory Gate is found on an external maintenance platform or balcony that is easily missed during the rapid ascent. Look for a path that temporarily moves horizontally or slightly downward against the natural flow of the level’s upward progression.
-
- Chapter 17: Shadow’s Fall
Given the narrative intensity, this gate is strategically placed to be overlooked. It’s often located near a DarkNest shrine or a shop, but tucked away behind a seemingly solid piece of environment, like a pile of large, stacked crates or a deactivated piece of machinery. The location demands a careful, slow sweep of the area after a hectic battle.
-
- Chapter 18: Path of the Great Dragon
The final trial before the game’s ultimate confrontation. This gate is placed in an area that players might rush through. After a mid-chapter mini-boss fight, search the highest possible platform or a remote ledge that seems impossible to reach at first glance. It typically requires the chained use of multiple movement abilities (wall-run, jump, dash, grapple) to access this final, demanding challenge.
Maximizing Your Rewards: A Guide to High-Value Keyword Strategies in Purgatory
The Purgatory Trials are essential for players dedicated to optimization and resource farming. To maximize your gains and sustain your momentum in this high-demand title, follow these elite strategies:
- Strategic Health Wagers: For consistent, high-yield results, focus on the Realm of War (30% wager) and Realm of Beasts (45% wager). These provide the best balance of challenge and reward without the crippling risk of the ‘Realm of Hell’ on a fresh playthrough. This calculated risk minimizes your time-to-reward ratio.
- Targeted Weapon Leveling: Use Purgatory to level up your secondary weapons. The concentrated enemy waves provide far more Weapon EXP per minute than standard exploration. Prioritize weapons with low mastery levels to unlock powerful new techniques that will be invaluable in the main story and the New Game+ mode.
- Ninpo Management: Always enter a trial with a full stock of Ninpo scrolls and healing items. The Purgatory enemies are relentless, and the strategic use of powerful area-of-effect Ninpo is often the most reliable way to clear later waves quickly and secure the NinjaCoin payout.
- Exploiting Difficulty: Once you complete the main story, return to the Purgatory Trials on Master Ninja Difficulty. The enemy compositions will be even more punishing, but the rewards—in both experience and the sheer satisfaction of conquering a classic Ninja Gaiden challenge—are exponentially higher, offering true long-term engagement with the premium gaming content.
The Purgatory Gates are a testament to NINJA GAIDEN 4’s commitment to challenging its players. By utilizing this comprehensive location guide, you ensure that you not only find every hidden trial but are also fully prepared to dominate the battlefield and solidify your status as the definitive Master Ninja of the modern gaming era. Embrace the bloodshed, and claim your rewards.